Showing posts with label cake. Show all posts

Friday, January 17, 2014

Doc McStuffins Birthday Party


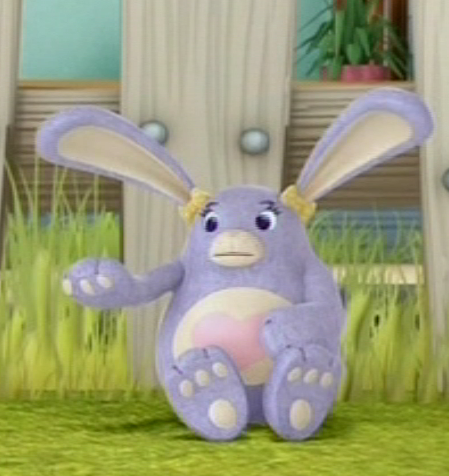
To be completely honest this may be WAY easier to do now, but let me tell you back in last May (2013) there was little to nothing out there for Disney Jr's "Doc McStuffins" so I'll let you all in on how we pulled it off without all the pre-made Doc business out there.

We had complete frustration and not only on my end but for those party goers that wished to get the Birthday Girl a theme related gift item. We had a few doubles, but she didn't care, it mean't shopping for her. We actually had four "Big Book of Boo Boos" at one point. I'm sure it bugged her guests a little. But like I said there is a lot more out there now so this may be not even close to an issue for you. So, if you are on a budget or just want your child's part to be a little different this may be a blog post may be of help.


First off I owe our regular Guest Blogger, Yajaira Preciado a big acknowledgement. She made these awesome treats and centerpieces that tied right in to the theme. Which I should expand, the theme was clearly "Doc McStuffins" but we also choose to do Doc's wardrobe colors pink and purple to add and polka dots here and there. I'll explain more on that after I walk through Yajaira's contributions.

The treats, the pretzel thermometers and the waffle cookie band-aids  I believe were inspired from something we found on Pinterest when searching for "Doctor" or "Nurse" party. Really simple but were a huge hit and were very tasty.

The pretzels were store bought and then dipped into melted white/vanilla candy melts (can get in Micheals). Once that set by laying on a sheet of wax paper, she then applied the melted red candy melt with her choice of pipping instrument. Once again let it set then pipped black candy melt into lines and a cute Riley message.

The "Band-Aid Waffers" were store bought sugar waffle cookies, vanilla, the color closest to band-aids. She just piped on a little pink candy melt as hearts in the center and once again added a message on the other side (once set that is). I found another band-aid idea on Pinterest which was cool, but more of the real, kind of gross feel and not what we were going for at all. Feel free to click the link if curious.


As for the centerpieces, I wish I had pictures to show you as the process goes but I'm sure you and your craftiness should be able to follow along. First things first, materials! Wooden skewers/dowels. Paint (color of choice). She did one purple and one pink. Glitter foam sticker sheets, typically at Dollar Store, but also at any craft store. Embellishments, these were of the scrap-booking variety. Ribbon, though you can go without, the polka dots on this just tied especially in. Styrofoam discs. Last but not least some computer print outs of Doc and whatever extra message you want. The 5 I believe came pre-cut on the sheet she bought, but you can always exact-o what you need. She printed out the words and a page size Doc image on photo paper of a thicker variety so it could stand and not fold. Cut those out. Paint your discs and skewers with the paint you chose. Once dry, hot glue cut ribbon around base. Cover the meeting seem with embellishment. Hot glue cut outs to skewers. All set? If so stab your disc with the wood and try to think center and balance so it's easier to keep standing. You can always add some hot glue, but she keep them so I can remove the wood on transport.


I also owe someone else a little extra appreciation, the wonderful lady I ordered Riley's one of a kind shirt from, Tiara at Sew 4 u Boutique!


It came out awesome and not only did she have this one for her party, but she also made a Lambie one for her big Disneyland Birthday Day! So go "like" and look at her stuff! Oh, an don't forget to let her know who sent ya. ;)

After knowing what the "Doc Riley" was gonna wear it was time to get to work. As I said, I could not find ANY thing in the stores, but I did find lots of cute purple and pink items.


Of course I started my search by hitting the Dollar Store once I knew Party City and what not didn't carry any Doc related items. Dollar Store had this great purple and pink Happy Birthday...Princess banner. LOL! Actually it was really perfect cause the only place that had the princess item was in the center where I already planned on needing to add a little "Doc McStuffins" to. Steps for that was super easy! Cut off princess crown (leave the top line where the words attach). Add "Doc McStuffins" print out on photo paper with cute Duck Tape, no evidence of item previously there.


While there I picked up the table covers, serving dishes, and plates, napkins, and utensil deal. All mixes of purple and pink but clear where I thought I could reuse, mostly when it came to the serving bowls and dishes. You may notice that I attempted to make the puffs again, you can see on Pirates & Pixies Party how I did it. This time I just mixed my color tissue in each puff, I was able to find both the pink and the purple tissue paper needed at the Dollar Store.


If you are wondering about the photo of Riley with her Lambies and Doc in the background, well it was actually just a cell pic I took of her on a sick day in bed. On Paint.net (don't be fooled, the actual site is not paint.net, click the link) application I just the background out and pasted it on top of "Doc McStuffins" image I found on Google.


Next made a trip to Walmart, found the best matching pinata! And got the odds and ends, but sadly they were lacking in the Duck Tape department. But Micheals always fills in the gaps.


I used the Duck Tape not only for the banner but went this route on the water bottles this time around, I was far to lazy to type up, print out, cut up, and glue labels on the water bottles this time. Though I still felt it wasn't too my crazy standard to leave the ugly water bottle labels alone.


Not to bounce around, but back to the pinata...it was a HIT! Lol! Get it, a hit!? Sorry, I'm a nerd, ya I know. I tend to avoid adding just candy fillers. A few small toy things and plastic jewelry goes a long way and kiddos seem happier. While I'm discussing what the guest kids got, though I don't have a photo I did make goody bags. Fun Doctor-ish related stuff, notepad, pencil, magnifying glass (plastic ones from Party City), and band-aids. Of course I also ordered some "Doc McStuffins" stickers off Ebay. The fun bigger ones that children get when good at the doctor's office. Also had some other random typical stuff, but hope that helps get the thought process going.


Beside the pinata we also had another game planned for before we all wandered outside and a few little entertainment areas set up to keep the kids happily engaged. Also helps that there was a huge television to play "Doc McStuffins" DVD on.


We had a ton of fun doing "Stick the Nose on Chilly!" Seriously, the kids enjoyed it so much that some kids wanted repeats, the ones that weren't worried about being blindfolded and spun around that is. ;) Very simple. I bought a big white poster board (less then $1 at the Dollar Store). I already had all the sharpie colors on hand that Chilly required. I studied the show and Google searched pics of him. This one was the easiest pose and I believe it was inspired from a coloring sheet found online. If you are really artsy inclined I'm sure other characters, like Pickles would work, but I went the easiest way. Plus, this fit with his character, since Chilly always thinks somethings wrong with him. LOL! We just used those tiny circle stickers for the nose. Got those garage sale label type stickers from Walmart, Staples wanted nearly $8 for them which was just crazy! Sooo much cheaper and way more perfect at Walmart. One parent helped me out and with a thin sharpie wrote each kids name as I guided the previous kid. As a prize the winner just picked out of my mix bag of goody bag leftovers and each kid got their pinata bag for finishing so no sore feelings.


I had the whole Doctor part set from the moment kids arrived. On the invitations we encouraged each guest to bring their favorite stuffed animal to join. As soon as they walked in the door I was there to greet and put a "Hospital Patient Bracelet" on their toy. Just labeled each with "Doctor ____'s" so I could say it was their patient and avoid anyone losing their item. You can find plastic closer to the real deal online, but we went for the paper ones so it was much quicker.

To continue the playing Doc, I had set up a little table with chairs for a hospital clinic area. Area was ready with Doc's Check Off Lists attached with clipboard and tied on pen. Inside the two plastic tubs were plastic doctor's tools. We found them for $2 at Toys'R'Us but since then have seen them at Target in the $1 bin section. We bought enough to also spread them out on the guest tables as centerpieces. In addition to that we had ordered a box of doctor breathing masks, just to be extra fun.


Here's a close-up of the center item hanging above the clinic area. I tried my best to replicate Doc's "The Doc is In" sign. Just a little glue, tongue depressors, markers, crayons, and string. I used one of the Scotch hanging hooks because I didn't want to damage the wall and no way was gonna be permanent placement.


The other station I had set up was for coloring. What kid doesn't love to color? Well Disney Junior's Site is  full of printouts so go nuts! All it costs you is ink and paper. I also had my daughter do a few extra to add as decoration to the fridge. I also found this Doc McStuffins Tot Pack thanks to "1+1+1=1." Those make good goody bag stuffers as well.


Of course no party is complete without a birthday cake! We got very lucky with this and got a hold of the last "Doc McStuffins" Figure Play Set from the Disney Store. 1) I'm sure there are more now. 2) You can always order online, but I was kind of frantic and down to the wire. Another great thing about the cake is it's just a Costco cake! So don't quote me on this, but from what I've heard from a few of their stores is that if you have a simple request and they have time...and maybe you ask very nicely the bakers may be able to do something like this for you. I just added the toy decorations once home. Sometimes they can give you extra icing if you request to attach such items, but her's were just perfect size so none needed.


Hope your party is much of a hit as her's was! We would love to hear about it! Feel free to add pics of your party or comment below! :)


Wednesday, November 7, 2012

Diaper Cake


This idea is for something a little more fun then just a box of diapers and a few baby odds and ins. I still remember from our diaper cake. Our baby shower was awesome and we got so many things, completely blessed. Though I appreciated every single item we got, our diaper cake was a stand out an we appreciated the extra time that was put into it. Other guests even commented on "how cute an creative" their gift to us was, so it was not just us admiring. So if you have some time to get this done I recommend it for those close friends and family members that you want to put a extra touch into the gift. 

First before we dive into this, though it isn't hard to make a diaper cake, it does require a good amount of time, so if you are short on that or can't clear some up some, you may want to skip. I had plenty of warning the shower was coming and made sure that I could use every bit of non-kid time to get it done. 


Now, What You Need:

Diapers! I used 100, but that is up to you. Base for cake, I used Styrofoam round and tissue paper (Glue & sponge paint brush help with that). You can buy a cake plate or do my same idea with a fowm board,it's just your call. In addition you'll need, regular white glue and Fabri-tac, cake dowels, and rubber bands, A LOT of rubber bands! Don't try to go cheap and use what you have, it won't work. Buy a big bag of random sizes because you will need a variety. Also you'll need, scissors, and minimum 3 things of ribbon. For the ribbon you want 1 thick to cover the rubber bands and be like your main them item and then I got 2 colors of curling ribbon, feel free to buy as many as you want of that. Only item I recommend that is not in above's image is a lighter or matches, I'll explain the need for that later.


Get the "needs to dry" part out of the way. with my plain foam base, a little white glue and some red tissue paper I made the cake's base/platter. Go light on the glue an use the sponge to spread it around. Then GENTLY pull the tissue paper over wrapping to the not so pretty underside. Go slow and rub down very gentle so not to tear your tissue paper. I personally didn't feel like 1 tissue paper gave the proper color, so I repeated, added a tiny more glue and pulled flat again. Let dry as you began the next step.

Ok, time for the most time consuming part. Get comfy and set up in a nice clean spot free of pet hair and what not because it's time to bust out the diapers! Seriously, remember this is for a baby, so keep as clean as possible and be careful not to rip diapers, don't want parents not so happy when baby is leaking. Normally I would recommend you buy a size like 3 because it lasts the longest and it gives parents-to-be time before they have to completely disassemble the cake, but in my case the shower was ahead of baby's arrival by a few months to avoid holiday madness and I had found the best deal on my favorite little disposable diapers (Pampers Swaddlers). 


Besides diapers, you will need your bag of rubber bands handy. Start by looking at your diaper, it should have a natural curl to it, go with that. Top (belly part) of diaper to bottom (leg part). Do it as tightly as possible and rubber band around it.

Those that know me already know this, but I'm crazy anal about things, so of course my projects are no different. So, what I did to hide the yellow bit on the diapers (yes, it did not fit my Mickey theme, an I want all white darn it!) was divide my rolls as I went. If I felt yellow was showing it went in one bag, if it passed my all white standard it went into another.

Now the fun part! Assembly!


Basically the point of dividing up the 2 bags was so my yellow ones could work for the hidden center part of each cake layer, while the white was the outer edges. The photo above is the process for 1 cake layer. Essentially, you want to keep making round bundles an after each time, before you add a outer circle you want to add a rubber band around. This allows you to mess with your cake, adding all the fun extras without ruining the whole layer, and if a rubber band snaps it's less of an issue. 

For a 100 diaper, 3 layer cake, my math worked out like this: Top - 15, Middle - 32, & Bottom - 53.


*Extra Tip* For the bottom layer I had a lot of breaking, so I ended up linking bands together and that worked.


Stack 'em. Now, skewer (cake dowel) them. *Word of Caution* Go slow & careful, use your fingers to feel around to. You don't want to accidentally rip any of your diapers.


First I got out my smaller items, an attempted to work them in. My little set of spoons became like cake candles to me. I also had a special topper for the top layer so I avoid using any of my stick out items.If you added as many rubber bands as I did, it really becomes no big to slip layers on and off. I tucked in a few little extras of items, like the spoons, diaper coupons, and more washcloths into the center of the cake, everything doesn't have to be seen and surprises are fun.


When working my baby beanies and onesies in I had to slide layers on and off, pop out a few diapers here and there, a little re-shifting till I felt everything was perfect. In the case of the beanies I even removed a few diapers from outer edge an stuffed the cap. Then returned diapers from the spot I popped them out of. Click on the pic, make it bigger if you need a little more thought on how to smooth or fit in items.


Once you get it pretty much how you like it time to add your thick ribbon around the rubber band mid-section. Remember measure twice, cut once.

To make it look seamless and to avoid fraying fabric edges take the end to a flame (lighter or match, both work). It melts the end and makes a nice brand new looking end. Fabri-tac one end of your ribbon to the other. I prefer Fabri-Tac because it really holds fabric together, no heat, and no spiderweb glue strings everywhere that would damage anything.


The finishing touches. With the curling ribbon add any extra tiny little items you may have picked up. I went with bath stuff, but you may add like baby rattle, teethers, and other little odds and ends. I slide one end of curling ribbon behind the thick fabric ribbon and out tying in front then curling. Then lots of curls and tucking anywhere I felt to empty.


Very last, I added that special topper I was talking about. This maybe answering your question if you noticed item pilled on top but not in a cute way. I save a extra beanie and onesie to fill it up. I can't tell you how to make that because I didn't, but I bought it from my other half of AlittlePaint&Yarn if you need it. Other ideas are stuffed animals, big bows, oh and the one we got had a rubber duck that said if baby's water temp was to hot. Our daughter still plays with that rubber duck. really it's up to you and you really can't go wrong.


Here's the Mickey Mouse Diaper Cake, final version. I prefer my cakes to be view-able from all angles, if you were wondering. 


Monday, June 25, 2012

Mickey Mouse Birthday


Every year I take the “go big or go home” challenge to planning my son’s birthday. Yes, I understand he just turned 3, lol. But really I have a reason. Here's some of the back story, when I planned his First birthday "Smurfday" (see the pictures here), I was a stay at home mom. I took my time and made it a very DIY event, especially since this was prior to the Smurf movie release and just simply there was nothing much I could purchase. For his Seconded birthday, I failed!! I was going to SDSU full time and I graduated the day before his birthday, so planning was not my priority. 
In order to make up for that last fail, with the help of Pinterest, and Felicia ( DIY for Mommies) as a sound board, I was able to make reasonable and achievable plans for his Third birthday.

We took Max to Disneyland for the first time this year, so it was only appropriate to have a Mickey and Friends themed party, "Mickey's Clubhouse."  Okay, so now I’m a full time Employee (Social Worker, part time photographer & blogger) and a full time Mommy, so I had to do this little by little. We made it work.
Granted that not everything turned out as desired…but does it ever? Max and his friends had a great time. 

 Here are a few of my favorite things from the birthday with links to my inspirations!


Here is the birthday boy. He is wearing his birthday ears he got while we visited Disneyland. The cake was inspired by a cake we saw at t local bakery, but being so crafty (frugal) I could not shell out the $250 for a cake. With the help of my mom, a retired Pastry Chef and my sister, who recently took a fondant class, we made this cake for a total of $30.00 which includes the purchase of the whole Clubhouse gang and candles (Dollar Tree).


The scene setter in the back is from Party City, and it wasn’t that expensive and it made a great addition to the cake table.


We also had a small dessert/candy table. It included Cupcakes, a may shift “Toodles” lollipop holder Mickey cookies (thanks to a dear friend) and some licorice, rice krispie treats and just yellow and red gummies. (Inspiration here)


Mickey Cookies, made by a good friend!!


Cupcakes, just regular white cupcakes (from the box) with wilton chocolate (candy melts) for ears.
The Minnie Cookies, I bought at Walmart. They are the Pillsbury ready to bake cookies. They are awesome.


Oreo Mickeys, as found on Pinterest.
And the Rice Krispy Treats also thanks to Pinterest.

*Items, before cutely placed on tables*

For Centerpieces, I used Mickey ceramic piggy banks that I found at a local Swap meet. They were rather inexpensive and a handy keepsake. I also purchased the Mickey boxes pictured above, found them in Mexico. I just had to paint them and add the buttons, to make them resemble the party invitations. Also, pictured above is an unfinished “Toodles” lollipop holder and a Mickey centerpiece.


We also had Mickey lollipops made of Chocolate. I bought that mold on one of my trips to Mexico, but I'm sure you can find them online


Black Linens, black chair covers, big red chair bows, and red, yellow, black balloons. 


We also made foam letters, was originally intended like the "Disney Junior" logo, but black and red worked an completed our look. The great thing is they are so light that a little bit of rolled tape and a push, then TADA, done!

To make it a little more festive, without requiring all the children to wear Mickey outfits, I made Mickey ears for all the children.

(learn how to make your own ears here)

But let's not forget, our main course…well Hot Diggity Dog! We had Hot Dogs!! 


We bought this bad boy from Walmart… and it was a hit. We had bacon wrapped hot dogs, regular hot dogs and chili dogs!!!


I got the hot dog holders from the Dollar Spot at Target.


Water bottle labels, look online cause it adds to any event! I've seen them done with just festive duct tape if you don't want to spend much time.


Birthday Boy and PiƱata :
Max had a wonderful time, which is what really matters.
Mommy and Daddy with Birthday Boy…
I’m glad it’s over, but I'm ready to plan next year’s grand event… not sure what the theme is yet, but I’m brainstorming.