Showing posts with label party. Show all posts

Friday, January 17, 2014

Doc McStuffins Birthday Party


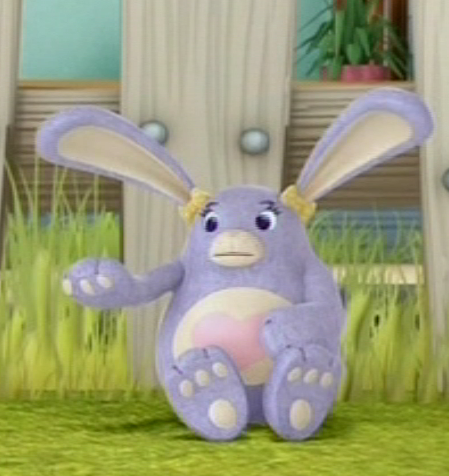
To be completely honest this may be WAY easier to do now, but let me tell you back in last May (2013) there was little to nothing out there for Disney Jr's "Doc McStuffins" so I'll let you all in on how we pulled it off without all the pre-made Doc business out there.

We had complete frustration and not only on my end but for those party goers that wished to get the Birthday Girl a theme related gift item. We had a few doubles, but she didn't care, it mean't shopping for her. We actually had four "Big Book of Boo Boos" at one point. I'm sure it bugged her guests a little. But like I said there is a lot more out there now so this may be not even close to an issue for you. So, if you are on a budget or just want your child's part to be a little different this may be a blog post may be of help.


First off I owe our regular Guest Blogger, Yajaira Preciado a big acknowledgement. She made these awesome treats and centerpieces that tied right in to the theme. Which I should expand, the theme was clearly "Doc McStuffins" but we also choose to do Doc's wardrobe colors pink and purple to add and polka dots here and there. I'll explain more on that after I walk through Yajaira's contributions.

The treats, the pretzel thermometers and the waffle cookie band-aids  I believe were inspired from something we found on Pinterest when searching for "Doctor" or "Nurse" party. Really simple but were a huge hit and were very tasty.

The pretzels were store bought and then dipped into melted white/vanilla candy melts (can get in Micheals). Once that set by laying on a sheet of wax paper, she then applied the melted red candy melt with her choice of pipping instrument. Once again let it set then pipped black candy melt into lines and a cute Riley message.

The "Band-Aid Waffers" were store bought sugar waffle cookies, vanilla, the color closest to band-aids. She just piped on a little pink candy melt as hearts in the center and once again added a message on the other side (once set that is). I found another band-aid idea on Pinterest which was cool, but more of the real, kind of gross feel and not what we were going for at all. Feel free to click the link if curious.


As for the centerpieces, I wish I had pictures to show you as the process goes but I'm sure you and your craftiness should be able to follow along. First things first, materials! Wooden skewers/dowels. Paint (color of choice). She did one purple and one pink. Glitter foam sticker sheets, typically at Dollar Store, but also at any craft store. Embellishments, these were of the scrap-booking variety. Ribbon, though you can go without, the polka dots on this just tied especially in. Styrofoam discs. Last but not least some computer print outs of Doc and whatever extra message you want. The 5 I believe came pre-cut on the sheet she bought, but you can always exact-o what you need. She printed out the words and a page size Doc image on photo paper of a thicker variety so it could stand and not fold. Cut those out. Paint your discs and skewers with the paint you chose. Once dry, hot glue cut ribbon around base. Cover the meeting seem with embellishment. Hot glue cut outs to skewers. All set? If so stab your disc with the wood and try to think center and balance so it's easier to keep standing. You can always add some hot glue, but she keep them so I can remove the wood on transport.


I also owe someone else a little extra appreciation, the wonderful lady I ordered Riley's one of a kind shirt from, Tiara at Sew 4 u Boutique!


It came out awesome and not only did she have this one for her party, but she also made a Lambie one for her big Disneyland Birthday Day! So go "like" and look at her stuff! Oh, an don't forget to let her know who sent ya. ;)

After knowing what the "Doc Riley" was gonna wear it was time to get to work. As I said, I could not find ANY thing in the stores, but I did find lots of cute purple and pink items.


Of course I started my search by hitting the Dollar Store once I knew Party City and what not didn't carry any Doc related items. Dollar Store had this great purple and pink Happy Birthday...Princess banner. LOL! Actually it was really perfect cause the only place that had the princess item was in the center where I already planned on needing to add a little "Doc McStuffins" to. Steps for that was super easy! Cut off princess crown (leave the top line where the words attach). Add "Doc McStuffins" print out on photo paper with cute Duck Tape, no evidence of item previously there.


While there I picked up the table covers, serving dishes, and plates, napkins, and utensil deal. All mixes of purple and pink but clear where I thought I could reuse, mostly when it came to the serving bowls and dishes. You may notice that I attempted to make the puffs again, you can see on Pirates & Pixies Party how I did it. This time I just mixed my color tissue in each puff, I was able to find both the pink and the purple tissue paper needed at the Dollar Store.


If you are wondering about the photo of Riley with her Lambies and Doc in the background, well it was actually just a cell pic I took of her on a sick day in bed. On Paint.net (don't be fooled, the actual site is not paint.net, click the link) application I just the background out and pasted it on top of "Doc McStuffins" image I found on Google.


Next made a trip to Walmart, found the best matching pinata! And got the odds and ends, but sadly they were lacking in the Duck Tape department. But Micheals always fills in the gaps.


I used the Duck Tape not only for the banner but went this route on the water bottles this time around, I was far to lazy to type up, print out, cut up, and glue labels on the water bottles this time. Though I still felt it wasn't too my crazy standard to leave the ugly water bottle labels alone.


Not to bounce around, but back to the pinata...it was a HIT! Lol! Get it, a hit!? Sorry, I'm a nerd, ya I know. I tend to avoid adding just candy fillers. A few small toy things and plastic jewelry goes a long way and kiddos seem happier. While I'm discussing what the guest kids got, though I don't have a photo I did make goody bags. Fun Doctor-ish related stuff, notepad, pencil, magnifying glass (plastic ones from Party City), and band-aids. Of course I also ordered some "Doc McStuffins" stickers off Ebay. The fun bigger ones that children get when good at the doctor's office. Also had some other random typical stuff, but hope that helps get the thought process going.


Beside the pinata we also had another game planned for before we all wandered outside and a few little entertainment areas set up to keep the kids happily engaged. Also helps that there was a huge television to play "Doc McStuffins" DVD on.


We had a ton of fun doing "Stick the Nose on Chilly!" Seriously, the kids enjoyed it so much that some kids wanted repeats, the ones that weren't worried about being blindfolded and spun around that is. ;) Very simple. I bought a big white poster board (less then $1 at the Dollar Store). I already had all the sharpie colors on hand that Chilly required. I studied the show and Google searched pics of him. This one was the easiest pose and I believe it was inspired from a coloring sheet found online. If you are really artsy inclined I'm sure other characters, like Pickles would work, but I went the easiest way. Plus, this fit with his character, since Chilly always thinks somethings wrong with him. LOL! We just used those tiny circle stickers for the nose. Got those garage sale label type stickers from Walmart, Staples wanted nearly $8 for them which was just crazy! Sooo much cheaper and way more perfect at Walmart. One parent helped me out and with a thin sharpie wrote each kids name as I guided the previous kid. As a prize the winner just picked out of my mix bag of goody bag leftovers and each kid got their pinata bag for finishing so no sore feelings.


I had the whole Doctor part set from the moment kids arrived. On the invitations we encouraged each guest to bring their favorite stuffed animal to join. As soon as they walked in the door I was there to greet and put a "Hospital Patient Bracelet" on their toy. Just labeled each with "Doctor ____'s" so I could say it was their patient and avoid anyone losing their item. You can find plastic closer to the real deal online, but we went for the paper ones so it was much quicker.

To continue the playing Doc, I had set up a little table with chairs for a hospital clinic area. Area was ready with Doc's Check Off Lists attached with clipboard and tied on pen. Inside the two plastic tubs were plastic doctor's tools. We found them for $2 at Toys'R'Us but since then have seen them at Target in the $1 bin section. We bought enough to also spread them out on the guest tables as centerpieces. In addition to that we had ordered a box of doctor breathing masks, just to be extra fun.


Here's a close-up of the center item hanging above the clinic area. I tried my best to replicate Doc's "The Doc is In" sign. Just a little glue, tongue depressors, markers, crayons, and string. I used one of the Scotch hanging hooks because I didn't want to damage the wall and no way was gonna be permanent placement.


The other station I had set up was for coloring. What kid doesn't love to color? Well Disney Junior's Site is  full of printouts so go nuts! All it costs you is ink and paper. I also had my daughter do a few extra to add as decoration to the fridge. I also found this Doc McStuffins Tot Pack thanks to "1+1+1=1." Those make good goody bag stuffers as well.


Of course no party is complete without a birthday cake! We got very lucky with this and got a hold of the last "Doc McStuffins" Figure Play Set from the Disney Store. 1) I'm sure there are more now. 2) You can always order online, but I was kind of frantic and down to the wire. Another great thing about the cake is it's just a Costco cake! So don't quote me on this, but from what I've heard from a few of their stores is that if you have a simple request and they have time...and maybe you ask very nicely the bakers may be able to do something like this for you. I just added the toy decorations once home. Sometimes they can give you extra icing if you request to attach such items, but her's were just perfect size so none needed.


Hope your party is much of a hit as her's was! We would love to hear about it! Feel free to add pics of your party or comment below! :)


Wednesday, January 2, 2013

Hasbro's Happier New Year's Game Night!

Courtesy of House Party & Hasbro

*Tip* Join House Party!! They give lots of freebies of real things people actually want, and to make it even better enough of items to throw a party! Great way to have some fun with all your friends and family! I got lucky after their application process to be selected as one of their Host(esses) for a "Hasbro's Happier New Year's Game Night." 


Being approved for this party we were sent Twister, Yahtzee, Draw Something (game, not app), and Scrabble Catchphrase. We also got some goodies to help the party, 1 Trophy & Crown for the Game Night Winner, some party cups and hats, along with coupons and batteries. Totally enough to get a Family Game Night on the right track, but of course I had to take that all a few steps further, it was New Years Eve after all.

We went for a mellow, warm up to New Years feel. Lots of goodies to munch on but not a big meal time, so if couples still wanted to go out they had room in there bellies and weren't already drinking and unable to drive. Also, made it a tad earlier (5-8pm) so my guests could avoid most potential NYE driver dangers.


This was the last night we could leave all our Christmas lights a glow so wed did...and throw in a few more touches.


Since they sent us yellow background hats and cups I ran with yellow. I bought some streamer and added it anywhere I could, stair handrails around television, anywhere I could. House Party provided their hosts additional links to items we could print an use, I made a little sign with it...also a way to deter from turning the tv on. I did get a few more trophies, knowing that we were gonna have a little one attending I wanted to be prepared in case any issues arise. 


I also picked up a few extras. New Year's Eve isn't New Year's without a few loud items. So noise makers were a must as was some sweets. I attempted for the first time to make Domino Brownies. I think they were kind of cute, my husband says looks wise a total fail. LOL! An yes, those are Ferrero Rochers, nothing says NYE like some gold wrapped chocolate. They worked as a added favor with some "Thank You for Coming" coupons for the games.


You may notice on a table there are some sheets with a pen laying by it, well I also printed out a few sheets New Years Writing Printable. I changed the best part of school year to say "school/work."  At the end of the night I sat with our Riley and asked her...kid's answers are the cutest! A few guests took some home to do in private.

I should had taken a picture, but I forgot, later we put out some more little appetizers, like smokies (sausage weenies, crock-pot cooked in BBQ sauce), popcorn chicken and some of Ore-Ida Potato Grillers. I wish I had more time or a bigger budget because I found these two ideas on Pinterest and I was dying!!! JENGA Cheese and Dice Cheese & Crackers!!! Seriously, would had loved to do the Jenga, even as a game it's self.


A few extra printouts that added to the decor was the New Year's Resoultion collage from "The Itsy Factor." I also found this New Year printable on Pinterest , but the link from there didn't work to the blog. It still worked for me to print though.


Games were all set, decorations a check and food was a go. Now it was just time for our group to get down to partying part!


Let me just say ALL the games were a HUGE BLAST!!! The newer version of "Twister" was some serious challenge and it was hilarious! Really enjoyed the new "Draw Something" way more then I ever thought possible. It still has the app premises of gaining coins by drawing something and guessing. It also still had the letters to help the guessing, just no bombs. Last but defiantly not least, "Scrabble Catchphrase." Took us a few times to get the rules straight but it was soooo much fun once we got it! Kind of like a trivia meets hot potato. "Boys Team" won, still unsure how that happened. Haha. Well my point is, Go Out and Get Any of these Games! Plan a Game Night because it was a great night for all of us (ages 4 to 50 something). We really all enjoyed it!!!


Did I show you the photo of our game night mascot? 'Cause I really have to, our poor old baby pug, Otis did great job rocking a party hat and watching out for dropped food. Too cute not to share.

an
HAPPY NEW YEAR!!!


Just want to reiterate, I do not own the rights to any of the Trademarked items and did receive items for free as a promotion to share, though the opinions remain my own. Thank you.

Tuesday, October 9, 2012

Doggie Party


Forget the kids, let's have a DOG PARTY! Just kidding, this theme would work just as well for for fuzzy 4 legged kids as well as our 2 legged human ones. I've seen plenty of kids with dog themes and its awfully cute, but here was my spin on a dog party.


My friend lives in a awesome apartment by the beach & she has 3 of the cutest dachshunds! Well the oldest of the bunch was hitting her big 16 years! There's no way we were gonna ignore a milestone like that and a perfect reason to have a b.b.q. party by the beach, right!?! Well, we could have went the "Hot Dog" route see as how they are weenier dogs, but that's to obvious. So we treated it kind of like any person's party with lots of bright colors and the typical happy birthday deco with a twist. We accented areas with paws and lot of dog toys!


Did the rounds and of course Dollar Tree was the cheapest and had the best mix of toys and bowls for this whole shindig. For fun think food (human food) in big dog dishes.


For dip, my sis came up with the cute little "Doggie Dip" slogan and I added a touch more to the food/water bowl with paws (including dewclaw). Puffy paint! Very easy, very cheap & no permanent damage. If you mess up it's super easy to clean so no worries.

"Happy Birthday Worm"

For the sign I downloaded and installed "This font is for the dogs" font and pretty much the exact same printing directions as from my Vintage theme bridal shower post. Just make sure your printer is set to whatever size you chose to cut your pieces of card-stock  I highly recommend printing a 1 page test sheet before attempting "Print All" just in case you like your letters a little more down or up. We also cut out bones to place a space between words. Hole punched one at each end and the letters 1 hole for each top corner. The only thing different was that instead of 1 long string that they were feed on each letter got tied to the next, so more like a chain style. String one to the next cut & curl. Extend the string on the front and back end & hang.


Each tree got a little more touches added. We got a ton of random toys from the Dollar Tree. As you see a little ribbon and a rawhide here an there.


As for the tennis balls, leave the netting on, just try to slice in half (our balls were a 2 pack). The with a little bit of Fabri-tac we twisted the open end shut. It kind of was like a spiderweb effect. Just add a drop and twist & twist. Yes, fingers did get sticky but no damage to me or the balls. Then I strung ribbon through the netting tying in a bid loop so it was easier to hang wherever.


The palm trees even got a little extra doggie toy decor. You may also notice on the ground a few more of our sidewalk chalk paws. There were paws everywhere and made a good trail leading up to party location.


It was all really cute & of course the Birthday Girl had to get gifts and guests had to get treats. May I recommend "Doggie Bags" instead of "Loot Bags?" ;) Wanna make your own dog treats? Here's a great link with some top recipes. Enjoy! I know your dog will!

HAPPY SWEET 16 WORMY!!!


Tuesday, July 31, 2012

1920's Birthday Bash


This year I turned 29 years old…holy cow! I'm 1 year away from being 30!! In order to celebrate in accordance to what I believe were some of the best years in my life, my 20’s, I thought it would be appropriate to have a farewell to my 20’s birthday bash! I asked for all my dear family and friends to help by coming dressed in their ritziest 1920’s rags. It was overall a great theme! It made it a extra great time with good friends, family and some booze!!

To set the mood I made the invitations from a compilation of other invitations I saw online. I just goggled searched: 1920’s birthday invitations, roaring 20’s invitations and got some ideas, especially for the wording.


The invitations read:
The Roaring twenties are back
INSERT YOUR NAME HERE
Requests the honor of your presence at a
“Goodbye to the 20's” Birthday bash
Guys suit up & Gals show off the glam!
Wear your finest 1920's rags to the ritziest joint in town
On INSERT DATE AND TIME
INSERT LAST NAME Speakeasy
YOUR SHINDIG'S ADDRESS
Prohibition is in the air. Your discretion is paramount.
Please Assume Alias. Admittance By Password Only!
RSVP YOUR STUFF
Hors D'oeuvres, Dancing, & Drinks
To make the invitation I bought an 8.5 x 11 cardstock in ivory and a 12x12 black scrapbook pack.
A pack of back feathers, ribbon in 3 colors (I choose teal, purple and green)
I already had the wax stamp and was from my wedding invitations.
I printed 2, 5x7 invites on each ivory cardstock.
In order to figure out how to fit the black paper to fold just a little over I had a little trial and error.
I cut a small strip off the side, then in cut the remaining square in half and then a little of the bottom. Not sure if that makes sense so I made a little diagram, unfortunately I don’t remember the dimensions.

I just placed the ivory invitation on top of the black strip and folded the black strip to give it a black border and to cover most of the wording. I then tied the ribbon around and made a knot. I placed the feather on the knot and with the wax seal glued it in place, and voila!!


Invitations done!
Food?

What to feed my guest was the hardest part. I wasn’t sure if I wanted to stick with 1920’s food since every time I goggled 1920’s food or meals always got some sort of deviled egg, cucumbers and black olive stuff. I’m not a fan of eggs, so I choose to just do a pasta since I’m sure my guest wouldn’t care as long as they ate something yummy, and it is way easier to make pasta, so Fettuccine Alfredo it was.


Now, the cake and desserts that was a lot of more fun!!


First, I want to say that my favorite piece from this table was the cupcake stand that I bought at Ross! It is so dang cute and it was only about $4.00 so I had to have it. My other favorite things are the little chalkboards mini tags that I used to label the food. I got them from Michael’s in their dollar bin section. It was a pack of about 12 so I only needed 1 pack, but bought 2 just in case. I also purchased a white pen from Michael’s that I used to write on the chalkboards (for fear of not being able to find mini chalks). You can find similar tags on Ebay but I’m not sure if they are the same thing, but they look very similar. I also bought a mini easel chalkboard from the same dollar bin, and my sister wrote a happy birthday message for me.

The Rosette Tablecloth was my ultimate favorite, when I found that fabric at the Fabric District in Los Angeles (that should be a whole other blog). I had to buy it and that was how I ended up deviating from my original color scheme, but it didn’t matter I love this fabric. I also purchased the chair covers and peacock feathers while visiting the alleys and it was a great bargain!!


I bought silver trays from Dollar Tree and I placed a round paper doilie on top (bought the doilies a while back also from Dollar Tree from their wedding section).


I made confetti flavored pink with white sprinkles cake pops (see here for about my a helpful cake pop maker) and I placed some on a bowl (also from Dollar Tree) and added some white river stones/rocks (another from Dollar Tree). The rocks allowed for the pops to stay standing. Since I made about 30 pops, I also placed some upside down on mini cupcake liners, and arranged those on a white dinner plate.


Cupcakes, Chocolate dipped strawberries, and chocolate mustaches completed the dessert table. To make the chocolate mustaches I purchased a Wilton Mustache Chocolate Mold and some Wilton Dark Chocolate candy melts, I followed the directions on the mold and presto!!
I used the same Wilton chocolate melts for the Chocolate dipped Strawberries.


I also had a Candy Buffet. I already owned clear vases, bought those awhile ago for another candy buffet for a baby shower for my brother and sister-in-law (that was shown in the blog about the Rosette Ball). To stick to the theme this time I went in search for 20's candies. I found a list of the candy to purchase through Old Time Candy. I ended up purchasing Mary Janes (those came in a cute box so I used the box as decoration on the table) Red Vines, Sugar Daddies, Dum Dums and Strawberry filled hard candy, all from the Dollar Tree (yes, I know I love this store). On that table we also added some pre-made pastries that I bought for the dessert table, but I ran out of room. The mini cinnamon roll bites were so good ($6.99 at Costco) and some cheese cake and raspberry filled tarts, I just couldn't not add them somewhere.


I did purchase Candy Cigarettes from The Old Time Candy, and they were a hit!! Wish I would had also bought the Charleston Chew candy!! Those were not as easy to track down in a store.


I also made some No Bake cheesecake and yogurt parfaits with fresh fruit and pre-served them on plastic shooters. The best part was the little appetizer spoons and forks that I bought for those (4in forks and spoons from Party City @ $5ea. pack of 40).
For the No Bake Cheesecake I used JELL-O® No-Bake Mini Cheesecakes.


Instead of cracker crust I crumbled a chocolate cupcake and added it to the bottom of the shot glass before adding the cheesecake. Added a slice of a strawberry, an dollop of cake frosting and chocolate syrup.


The yogurt parfait was just granola, vanilla yogurt, strawberries and blueberries. Alternating in layers, although due to limited space I think it was just one layer of each.


My cake was Chocolate with fresh strawberry filling!! I followed a rosette cake tutorial: here.
Unfortunately, we had to keep my cake inside the house, since we didn’t make enough space for the cake on the dessert table. Though, it was probably for the best so outdoor issues didn't ruin it. The Cake and the DIY stand looked pretty nice if I say so myself. My inspiration, had a price tag of $40 for the smallest one in a store, so I went DIY. I followed the instructions from this pin. The only slight different was, instead it was sprayed white and had added trim. The spray and trim were purchased at Michael's. I couldn't find the info on the their website, but it was in the same aisle as all the ribbon. I only needed 1 spool and it all came out to like $7.00 including spray paint, plate and wine glass (instead of candle holder).


For the table, since I wanted a dinner style party, I got 3 rectangular tables and placed them in a long line. I bought fabric to match the rosette fabric from the dessert table and used that as a table cloth. Since I host thanksgiving at my house I have charger plates galore, so I took those bad boys out, mixed an matched them and added my collection of wine and margarita glasses to add a glamorous touch. My mom made the floral centerpieces for me using fresh roses, star gazer lilies, baby’s breath, Irish bells, Hydrangeas, Blue Delphiniums and a peacock feather. I had 1 candelabrum from a while ago, and I found another at my local Swap meet for $2 and I borrowed the other from my sister-in-law.

I dangled fake pearl beads from the candelabras and placed candles (even citronella ones for the uninvited guest) and mirrors for decorations. I also bought mini wine bottles, and placed them in little wood crates I bought from Michael’s for a dollar. I added some gift basket shred and it looked cute.


For additional dƩcor I bought 18ct black music notes form Party City to add to a canopy and the front wood gate.


If you noticed we had a few spots with great fabric hanging around, it worked out for a little photo spot. There's plenty of make your own photo booth props you can find online, just Google photo booth props, print them on card stock glue the prop into the foam paper, with the skewer in between and presto, they were done. I'm sure you can find some on Pinterest as well. We were also very lucky to have a friend show up later in the night and set up a full on real photo booth, he also had his own props and everyone had a blast. 


I also pulled out some of my vintage feel items from around the house and added a extra little sitting/photo spot. Always eye items you already have! (The trunk you see there is a family heirloom that my mother-in-law gave me when we purchased our home...after I had been asking for it for a year, hehe!!) You'll be surprised how well the items you find laying around work and way cheaper then buying more just to use for one party!

What I believe made the party, besides the booze, photo booth, family and great friends was a Rockola (aka jukebox) I rented. Unfortunately, it did not have much English Karaoke music, but since it is very versatile and it played music videos and plain ol’ music, and although a little out of era, we played Frank Sinatra (it’s still Jazz right?!) for a few hours until everyone was brave enough to make their own music request.

This was a very stress free event...other than trying to decided what to wear. Though figuring that out was a fun excuse to look at vintage pictures, watch "Great Gatsby" with my sister. Research is very helpful.