Showing posts with label frame. Show all posts

Tuesday, September 4, 2012

"Things To Buy" Fridge Helper


If your house is anything like mine you either are always running out of items or finding that when restocking that the one item you just picked up so did your spouse, gets rather annoying when our fridge is now full of condiments an has less room for actual food. This is where the GENIUS STRUCK, of course I could go the normal route and buy a little paper pad with a pen and a magnet but why do that? LOL! Ok, really I just hate wasting paper so I really don't like it, plus I wanted to try something a little better looking, so here's my idea if you just want something a little different.


This project wasn't as easy as I first perceived. It became a little game of trial and error, but I'll give you what I've learned and you can make the best decision. Let me begin by giving you a list of some awesome sites with some print out organizing sheets that may/may not work for you and your lifestyle needs or at least this project.  The one in my main image came from: Artsy Fartsy Mama (btw, she's AWESOME). There's a huge list of sites complied on: Creative Organizing. I also have a tear off sheet shopping list version idea from pinned from here: Infarrantly Creative. If you chose to go with that sites, you are going to want to tweak the list so you can make it a list but not in the tear off form or go ahead and go with that blog idea, but it won't work this blog. In the end I went with a simple white sheet with a cute script saying "Things To Buy" & a sharpie drawn heart in the bottom corner cause our hand writing was to big for this cute weekly layout. (I'll show you later.)

Whatever style sheet you chose to print you'll put in the frame behind the glass and  use like a dry erase board. Dry Erase Marker whatever you need or to make note of and use your cell phone to take a picture before each store trip so no extra trees killed and just erase off the list whatever you got. Really when do we ever go shopping without our cellphones anyhow? This really makes it easier then finding a little scrap of paper in our purse to.


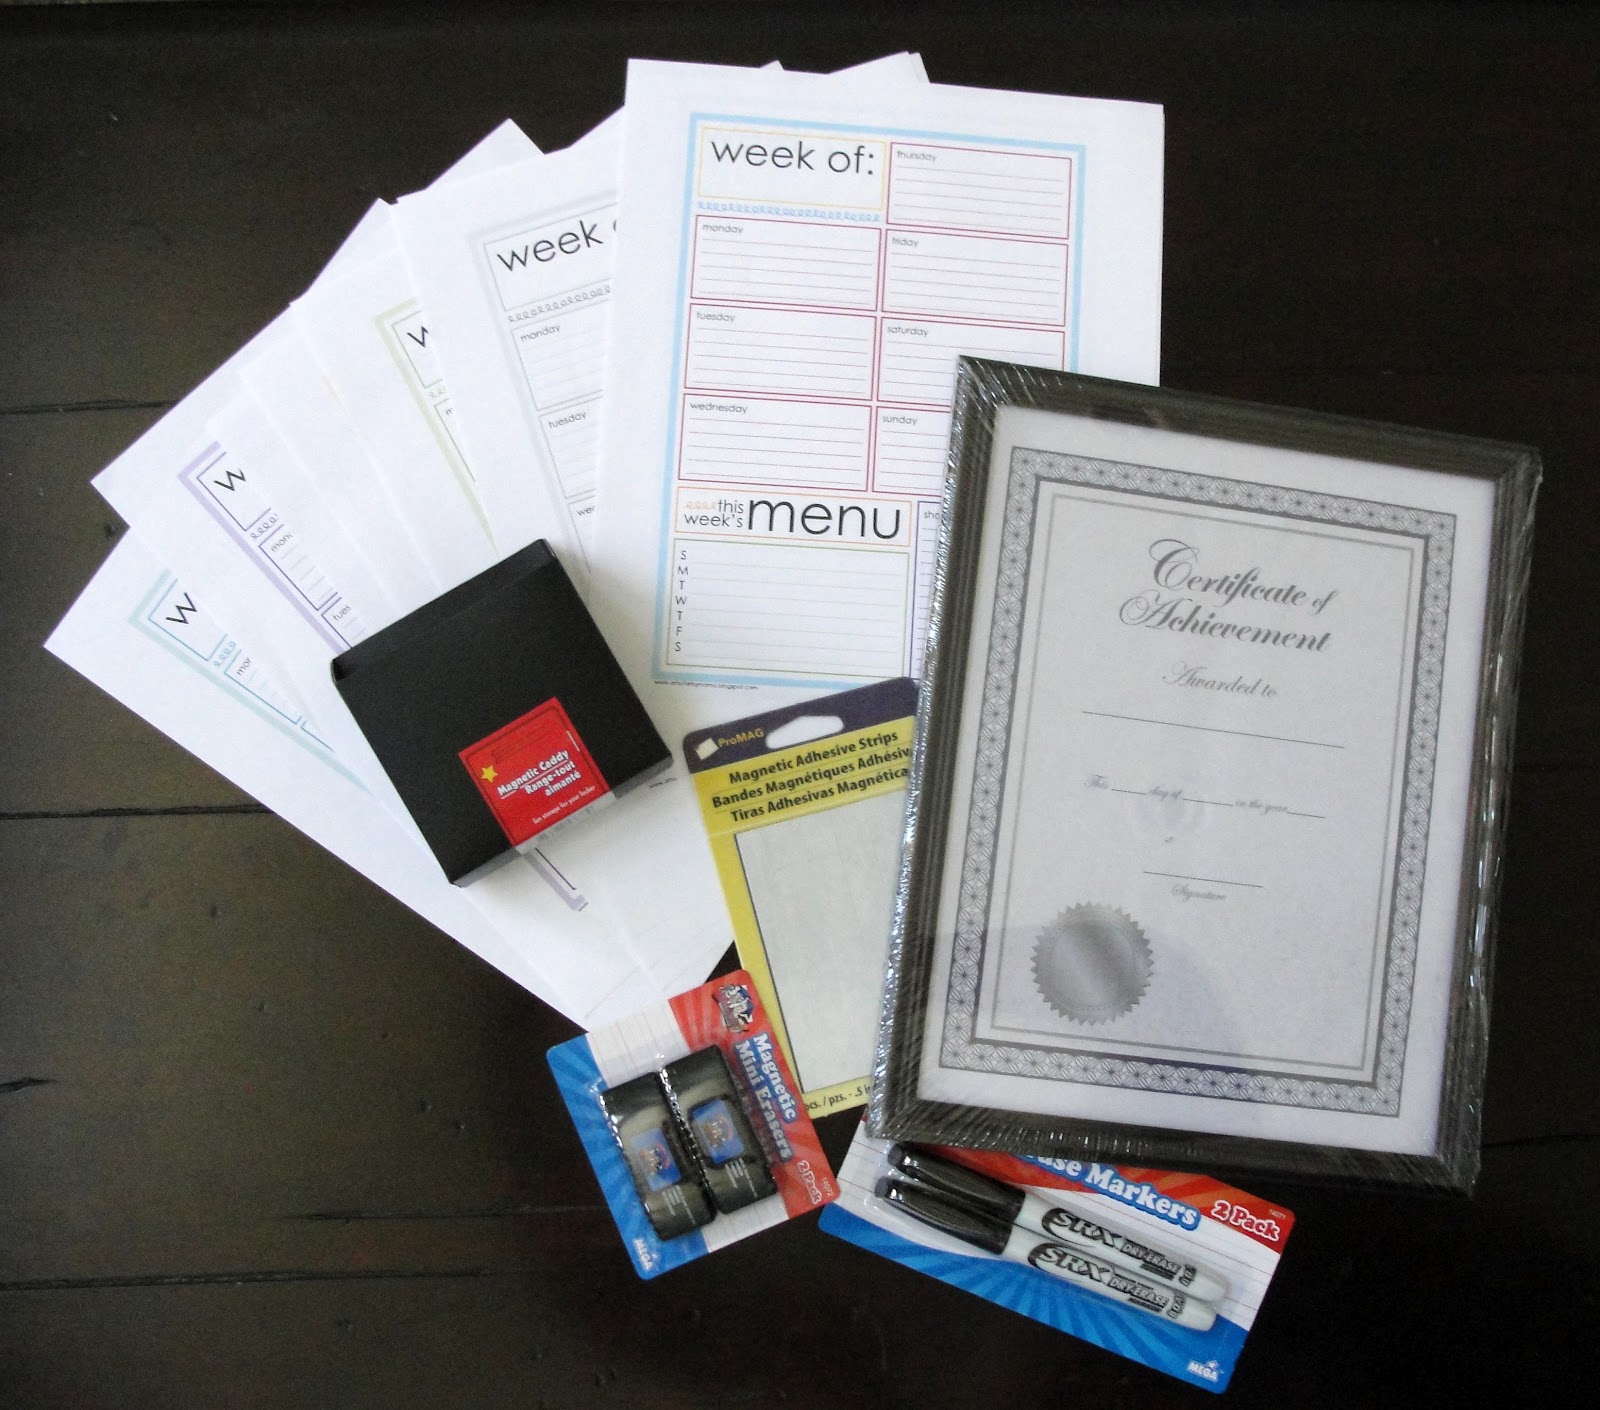
What you need: 1 Document Size Frame, unless you wanna cut your paper to whatever size this just saves a step. Whatever sheet from the printer. Dry Erase Markers & Erasers. Found ours in the cheap bins at Target. Magnet strips from Micheal's. You will need in addition to picture, craft glue. If you are lucky you will find at the Dollar Store already made magnetic pencil holder. I think intended for "Back to School" locker organization, so check those sections of your stores.


Assembly time. Remove wrapping, blow off dust, the typical fun stuff.


*TIP* If your frame has metal hooks for wall you may want to remove, as to not scratch your fridge.
Now put your sheet in. push Down your tabs and check the width of your magnet strip.


Ours was perfect to go on the cardboard an touch the fridge, if yours won't be so great you may want to cut and glue the magnet into strips to be placed the edge of the frame.


Here's where we had a lesson. We didn't run into any weight issues or our magnets giving out, but originally we didn't add any craft glue. I didn't think of a issue needing to worry about this. I had my husband test slamming the refrigerator door open and shut with out it moving so much as a milometer. We just trusted in the sticker part, well it got so humid that it just let go, we got lucky and it wasn't a issue so I reinforced it with craft glue and now that baby hasn't budged...and it's been even more humid.


It's been awhile now & it's still up an being used, eventually I'll change it out to a cuter piece of paper maybe add a defined Farmer's Market section, but this has really helped us. Hope it helps you just as much.

Monday, July 9, 2012

Collage Mat Idea


Once upon a time, my mom & I took a great girls trip to Vegas. One of the places on our little get away we got a caricature made. It was a odd size and drawn to the very edge, but a GREAT memory! My mom kept it, but never knew what to do with it, so before she got a chance to hang it I snuck it away an got down to work.

I was lucky, I took tons of pictures and every where had free tourist magazines (being a scrapbooker I snatched everyone up with plans of future pages), but you can do this with any items relating, even just a color scheme. If you want grab some scrapbook stickers for a extra touch do it, I did. What else you need it: scissors, photo-safe glue stick, 4 scrapbook photo corners, acid free poster board and frame of choice.

*Just for example, I'm demonstrating on a much smaller scale.

Cut down your poster board to the size of frame specifics, I believe this was a 16x20 and my image was a 14x18, so it gave me 2 inches around to decorate.

Get out your magazines, scrap paper and photos. Time to get to cutting!

Yes, that's a Ikea Catalog, but it works. Also, my photo washed out the color, but it was more blue.

When considering the background you want your base to be full of color, though it shouldn't show, this just makes a good base for if part does show. Make sure the whole poster board has solid pages of great colors glued to it.


Now comes the fun part! Better to have too many then not enough. Pull every image you even are slightly considering to use. I stick to 3 types of cuts. Rounding (kid w/towel), exact (yellow truck) & square (plant an mom w/kid). In the past I used lots of fancy cuts with my scrapbook scissors, but when trying to layer them together those always got left out because the edges would clash too much. Also, since it's a collage you don't want it all uniform.


I like to make piles. Piles by size and by cut style. Work largest images first to smallest. Remember to change up the angles when gluing to make it more interesting. If you are just making a collage fill the whole thing, but if you are using this like my project as a mat, work edge to inward. Square cuts are the easiest around the edge since it needs to fit in a frame, though you can trim extra bits away. 


As you are working the mat, remember you don't need to fill in the whole poster board. I kept my main subject handy an would lay on top every once in awhile so I can get a rough idea if I covered everything or didn't cover parts of the background image that I wanted showing. Once I was happy with my background,
mat I laid the caricature flat and in the middle then attached my scrapbook corners to the collage. I did not add one bit of glue to the main subject, if anything happened it could be easily removed and frame changed. I picked up this frame at Aaron Brothers, check for coupons and for Penny Sale dates.

It's a great statement piece and it really brings back so many memories, much more then just 1 picture alone could ever do, it also made a great surprise gift.


Friday, June 1, 2012

DAD Frame Gift


Last year's Father's day my husband, Dereck gave strict rules to his Dad's day gift, "No money. PERIOD." So Riley & I got our creative juices going and this was the end result.

At least bi-yearly we make a trip to The Picture People. If you have one, look at their website because they ALWAYS have a coupon and they honor it along with their Portrait Club. Okay, I'm not a sales person, but I'll give you the short, for the cost of the membership (which costs less then the freebies) you get a 3 free sheets and 3 $10 off to use at your portrait sessions, so it pays to join. Since they had a awesome Father's Day promo and we were (still are) Portrait Club Members we thought up the brilliant idea of pics. Hehe. 

A little more back story, my husband is a Veterinary Technician. My friends think it's cute to encourage her to take follow Daddy's footsteps, so she has been giving plenty of scrub stuff. She has a fake scrub top and Doctor Bear. We also have a few real stethoscopes lying around the house do to Dad's profession. The same friend that gave her the scrub top thought it was hilarious to give Riley a giant stuffed dog. Let me mention this gift was just like the friend's real dog and had to drive home with us from Sacramento back to San Diego with a pit stop in the Sequoias. Along with all that fun we had plenty of band-aids, a extra benefit of being a household with a kid. 


Pictures turned out awesome and I think I may had ended up spending a few cents on tax, but I don't even think it cost me that. Three pictures were my absolute must haves and then the idea of a DAD Frame popped into my head. Now to think on making that work without spending...

I was just about to make my own DAD template by either typing and printing or drawing it out when I got the idea to Googled it. So funny! Martha Stewart had a template! Score! It wasn't exactly as thick as I wanted it but that was a easy fix. I then checked out her idea on how to do this project: Father's Day Cutout Frame. It was really similar to what I had in mind, but I really didn't follow her way. I didn't like the unfinished back and I wanted it to be a little bit more from our little one as opposed to a just me project.

Feel free to follow her directions, but here's how we did our's:
You'll need- 3 pictures, scissors, Exacto knife, cutting mat, heavy card stock, glue, masking tape or glue stick, 2 paper clips, paint brushes, paint and or glitter glue.

For our pictures I knew this wasn't a photo safe, acid free project, so I copied the pictures to simple black & white, also this was to easy my stress about cutting these beautiful images up. We worked with wallet sized versions. (I placed originals in a handmade Father's Day Card.) While I was printing I printed out Martha Stewart's template.

I gave Riley the card stock color options, any heavy scrapbook paper I had two of. She totally stuck with scrub blue.

Placed my template on top of card stock and paper clipped together. Roughly worked outside the letters with scissors, like I said I wanted our letters a little thicker. When you are cutting just make sure you have a flat very linear bottom so it can stand on Dad's Desk or what not, If you want thinner cut right on the lines. After that bit was done, the very careful Exacto the inside parts (the picture holes) step. Make sure your template is where you need it, re-clip it and work on top of your cutting mat. No need to gouge your table. It also is helpful to go over any tight spaces you couldn't get to with your scissors, just be gentle and careful not to rip or you can start over. Once that is done paper clip that DAD piece of card stock on another and bust out your scissors, again. This time your just making the back to hide all the rough picture trimming, tape, paper clip and glue mess.

Now is the time that if your kid is like mine and wanted to add a little something extra to the frame to go for it. She painted a silver glitter glue to the frame.

If that the frame is dry time you can finish the project up. Adjust your pictures inside DAD's holes (picture's will be secured to the backside, the mirror image side) and trim and hold in place with masking tape. Just make sure tape is on the back of picture and not hanging over any sides where the front of the letters will see it. If you would rather let your child glue stick the back of the frame piece and then place pics in you can, just trim the images after they are glued down so there isn't any gaps in the windows of the DAD frame. 


Unfold your paper clips half way. Tape the flat shorter end of paper clips to the middle of each D. Now I let my daughter have fun gluing the back card stock on.


Maybe this helped you stay in budget or at least got you thinking.

Happy Father's Day to all you Dad's out there! 
An to my husband, the greatest Dad I know. 
Riley is a very lucky little girl to have a awesome Dad like you!